Archive for the 'home decorating' Category


Papering tables

Remember when the GAOOG did her guest post and the world went bananas for it? Well, I wanted in on that action. And what better opportunity for me to jump into the world of self-adhesive wallpaper than Chasing Paper‘s recent cutting room floor sale? I can think of none. So last week – fueled on by a cute email offering me free shipping – I sprung for a piece and it arrived days later at our door. I had no idea where I was going to put it, but since when does that stop me from pulling out my pocketbook? Unfortunately, pretty much never. Why does this paragraph have so many rhetorical questions? No clue.

img_1653

Anyway, as you can see, the print is way cute. The flowers were much bigger than I had thought they’d be but this is neither a good nor a bad thing. It’s just an observation. After walking around the house for a bit, I settled on papering these Ikea bedside tables of ours.

img_1651

You can’t really tell from this picture, but the finish on the tops are not great (especially on mine given that on most nights, I can be found with three to four different beverages on the night stand) and could tolerate a new look. So, after measuring them, I cut the paper significantly too big. So then I trimmed it. And trimmed it again. And again. And then stuck it in place.

img_1655

Using my debit card (not an old credit card because I do not have expired cards lying around), I tried to smooth out the bubbles, but it didn’t really work all that well. I’m darn happy with the overall result, though.

img_1656

For $20, I got a 2′ by 4′ piece of this beautiful paper (that is super thick and almost fabric-like, by the way), which was more than enough to cover two tables. I have some paper left over (and would have had more manageable pieces if I hadn’t been such a dunderhead about mis-measuring in the first place) and might try it on a couple of other things. I now really want to get cracking on wallpapering our powder room.

img_1659

Tackling the porch

Since moving into our new abode in April 2014, one thing has remained constant: the front porch has been used as a storage space. And it’s been totally embarrassing. On Saturday morning, it looked like this:

IMG_1191[1]

Not pretty.

IMG_1192[1]

Yep, there were still moving boxes out there. And very icky carpeting. So, my task, which I chose to accept because I assigned it to myself, was to make the porch a usable, reasonable-looking space in one day’s time. And without spending any money (at least at this point, but I am coming for you, boob light number ten!). And by using as many of the materials found on the porch as possible in order to minimize having to move things into the basement. And to be unsentimental in tossing things that have been out there for more than a year and a half and out of use. Also, there were about 700 pictures out on the porch that needed to get up on the walls. A lot of them were things purchased or framed or gifted (or a combo of these) long ago that aren’t really my taste anymore (see: Renaissance art), but are perfectly decent pieces of artwork and deserve to have some wall space. At least for now. So, with all of that in mind, it was: ready, set, makeover!

The first order of business was to fix that God-forsaken nasty carpet situation. What on Earth was going on with that? It needed to be covered STAT. I realized that I was holding on to those carpet squares that had never quite worked out for us the first go round. In fact, you can see them in a pile in the picture above. I didn’t have any of the sticky stuff left to put the tiles together, but I wondered if I could just kinda place them together and hope for the best. About two seconds after having that thought, though, I realized that while we may not own the official sticky stuff, we surely had duct tape and that should work for this type of project, right? Why not?

IMG_1193[1]

Mollybear had to be talked into the checkerboard pattern, but once on board, she did a great job jumping on the tiles to secure the tape in place. I ended up a little bit short tile-wise, but I had decided I wanted to layer the space with another rug anyway (remember, minimize moving things into the basement!) so I put this yellow number up against the wall to cover the few inches of icky carpet that the tiles weren’t able to reach.

IMG_1199[1]

This is a chair that we bought in Richmond that I’ve been unsuccessfully trying to sell on Craigslist, but I’m now happy has ended up still in our house. That little blue blanket on the arm is covering a puncture wound inflicted by one dog or another (not Gracie, I’m sure) and is actually Bear’s first stroller blanket and I’m not too keen to get rid of it. Two Wisconsin Film Fest pictures are poorly framed and hung too close together on the wall, but look here, folks. There are things on the wall! Let’s remember the point of this project, ok? Getting things off the floor and onto the walls! IMG_1195[1]

Looking from the other direction shows the firewood bin that we bought at the antique store between dogs. It made for a fun toy bin (I painted it) for about two seconds before Gertie and then Phoebe showed up. For now, it is housing a printer and a bunch of paper and other miscellaneous-crap-I-don’t-know-what-to-do-with-but-is-stored-nicely-in-that-chevron-bin.

IMG_1206[1]

This is my grandma’s one-thousand pound vanity. Some of the drawers are a colossal pain to open. I have moved this thing way way WAY too many times. Maybe M-Bear will want it someday. For the foreseeable future, though, it’s going to be in this corner of the porch, housing some cords in that lower left-hand drawer and some sandwich cutters in interesting shapes in the upper right (note to Kate: if you forget where those cut-outs are, you put them right there).

It’s not going to win me a show on HGTV, but I’m pretty psyched that the porch is cleaned out and the space is usable and the carpet is covered. Phew.

IMG_1203[1]

And now, about that boob light…

IMG_1204[1]

Ode to a light (in natural light)

I don’t think my previous post on our new Barn Light Electric schoolhouse light was doing it justice, so the light and I sat down for a photo shoot this morning with the bright November sun streaming through the windows. It still proved to be a bit of a challenge because (a) the space is small and (b) I’m not much of a photographer, but I think the results are better than the last go-round and I feel that I’ve done my part to show her in a better light. Ha.

SONY DSC

What does this photo have to do with anything? Not much. In fact, it was taken before the photo shoot I referenced. Just seeing if you’re paying attention.

SONY DSC

Ah, here she is. The beautiful Rudimentary Schoolhouse Flush Mount Light in the large size with a triple band in buttery yellow and a black base. It seems somewhat rude to call it rudimentary, but it is simple and classic so there you go.

Yeah, I think the red door is not a good match for the yellow, either, but that change is for another day.

As you may know, our old place was full of color all over the walls. In our new place, I’m experimenting with a neutral gray on the walls (totally unusual for me) and then playing with pops of color. Lots of pops. I’m also looking to expand into wallpaper. Watch out.

It’s not a very big foyer, and I need to figure out how to cute-i-fy it a little more, but this light is doing a lot of the heavy lifting and I’m really grateful.

A first for life and pups! A guest post!

This post is long overdue (because I’m slow), so without further ado, here is a compelling and instructive post from the GAOOG on her recent experience with the coolest of the cool, removable wallpaper.

***

Hello all!! Thank you to the brilliant, and my favorite, designer, Kate, for inviting me to do a guest post on her blog!!

This post has been a long-time coming as this DIY project unfortunately took much longer than it should have to finish. Should you decide to take on a project like it, I hope my mistakes make your experience much easier!

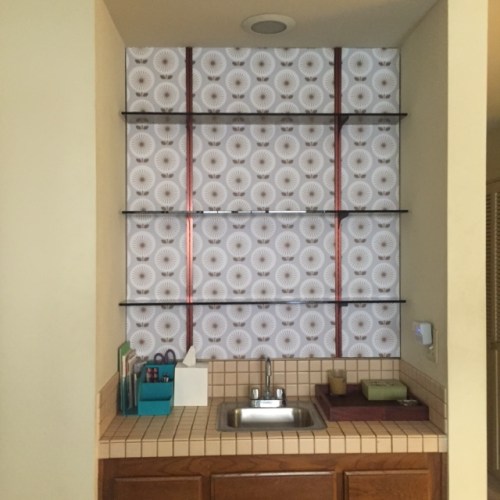
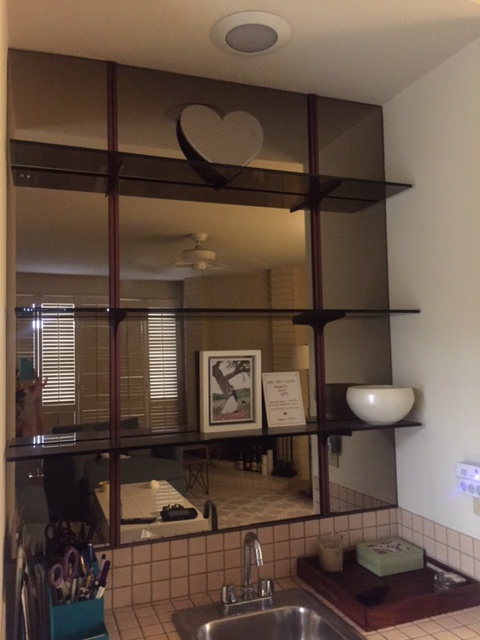
We live in a two-bedroom apartment that was built in 1982, a real pinnacle moment in time for design, wouldn’t you agree? Sigh. So much brass and mirrored-glass. Because we rent, any changes I make have to be temporary and cannot cause damage. I’ve been able to do a modicum of updating through furniture, art and organization, but there are some things that require a lot more magic (see: all that brass and mirrored glass). One of the biggest sources of my frustration was a wet bar in our living room. It had a smoky mirror behind it and smoky glass shelves. It was rather dark and depressing and the uselessly dim recessed light above it did not help.

image1

I googled options for covering up mirrored walls, and scoured Houzz, Apartment Therapy and various sites that might address this issue. Painting the glass wasn’t an option because I needed something removable. I considered chalkboard tiles but found nothing that was suitable and, let’s be honest, they wouldn’t have looked right with the tiles and the wet bar.

I sought the help of my previously-mentioned favorite design expert, Kate. She suggested removable wallpaper, and sent me to Chasing Paper! Genius! Thank you, Kate! Within hours I’d ordered an adorable pattern that would go swimmingly with the 80’s wet bar! Huh. That’s a sentence I never thought I’d say.

Now, here’s where things get sticky. Pun intended. 🙂

My first mistake: I did the math wrong and ordered only two sheets, when in fact I needed three. This is very much a me-mistake and I’m confident none of you would do the same. I soon realized my error and ordered the third. Obviously I was annoyed with myself because I unnecessarily paid twice for shipping, but this is not worth getting hung up on. Moving on.

After what seemed like an eternity, we finally had all three sheets! Hooray!

That’s when we realized what our next hurdle would be – cutting the paper to size. Now, when putting it up on walls most people clearly just stick it up and then once it’s up, cut it. JB thought we could do that, too, but we didn’t want to stick it up without knowing if that would work, and we could not risk cutting the glass. We tried it once, using the brackets for leverage, but getting the X-acto knife through both the wallpaper and the removable backing, while also getting a nice clean line, proved to be a nightmare. I suggested that we instead cut the two-ply sheet with a piece of cardboard underneath it. That way the knife would have something to stick through and we’d have better leverage on the floor. JB was hesitant, but we tried it and lo and behold! It worked beautifully!

image1 (1)

As you see in the photo, we used the glass shelves to make sure that we cut straight. They were weighted and the perfect length so, win-win. Once we got the first strip cut, we faced our next hurdle, sticking the piece up on the mirror. I hadn’t realized how challenging this could be because the Chasing Paper video made it seem so delightfully simple! Lies. Sticking it up on the mirror and getting it to line up right without bubbling was neither delightful, nor simple. Our first few attempts were disastrous. JB held the top of the paper as taut as possible while I tried to smooth it on the mirror from the bottom up. No matter what, the paper bubbled. I wished we had a tool like a cake-batter scraper. Wait! Why not use a cake-batter scraper? I grabbed our rubber dish scraper (clean, of course) and used it to smooth out the bubbles little by little. It worked like a charm! Though all of our arms were exhausted by the end.

image1 (2)

We worked our way through the right side piece in the same fashion. We then sadly realized our middle piece was cut wrong; the pattern didn’t match up. Alas. We’d have to order yet another piece. Ugh. More shipping costs. In the meantime we still were able to cut the top side pieces to match, so we went ahead and did that. We’d at least had the forethought to hide the seam under the top shelf so we had a little leeway with the matchup of the patterns if we needed. Luckily those two pieces matched nicely and went up easily because they were so small. Finally we got something right!

Next, we waited. Again.

image3

By the time the piece arrived, the wait had actually ended up being a welcome one. I think we needed a breather — for the sake of our marriage, as well as our arms. When the piece arrived, we laid it out, brought out the cardboard and got to cutting. As this piece was the biggest and required intense matching up on both sides, it proved to be the hardest to get up. It was difficult to get it aligned and to keep it straight all the way to the top. It tended to veer off course easily and, once again, keeping out those damn bubbles was trying! Sadly, it took us about three times and I had no new tricks to try. In the end, slow and steady won the race. That, and a lot of finagling with the dish scraper.

image2

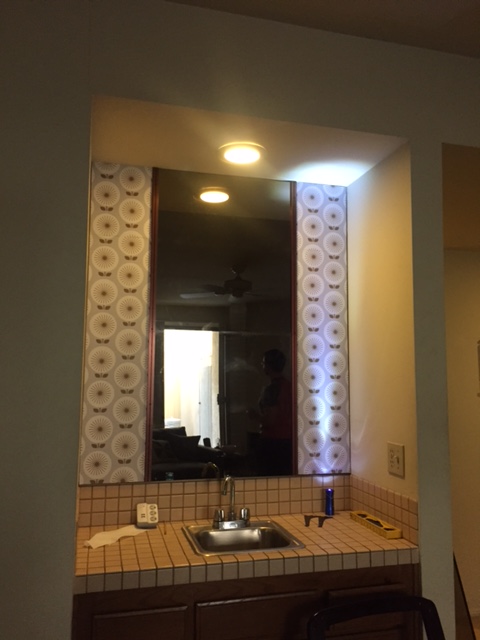
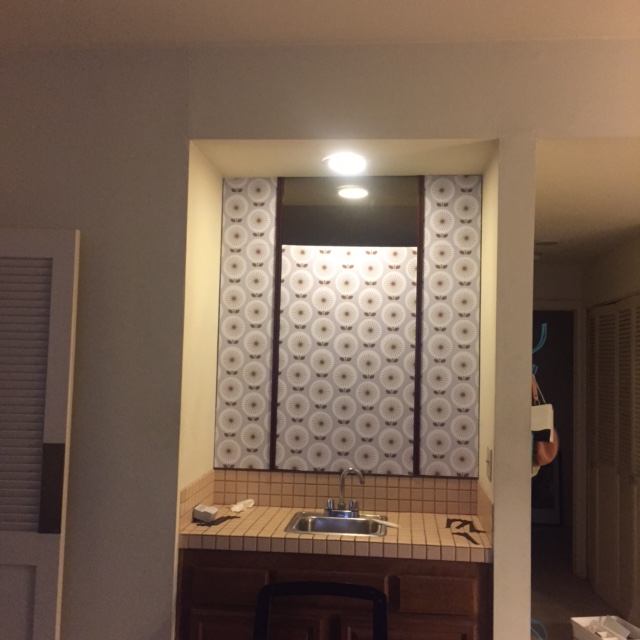
The small top, middle portion was our last bit and not terribly hard due to its size. Voila! Three weeks and some change after the idea began … we finally had a beautiful, bright, mirror-less wet bar!!!

image3 (1)

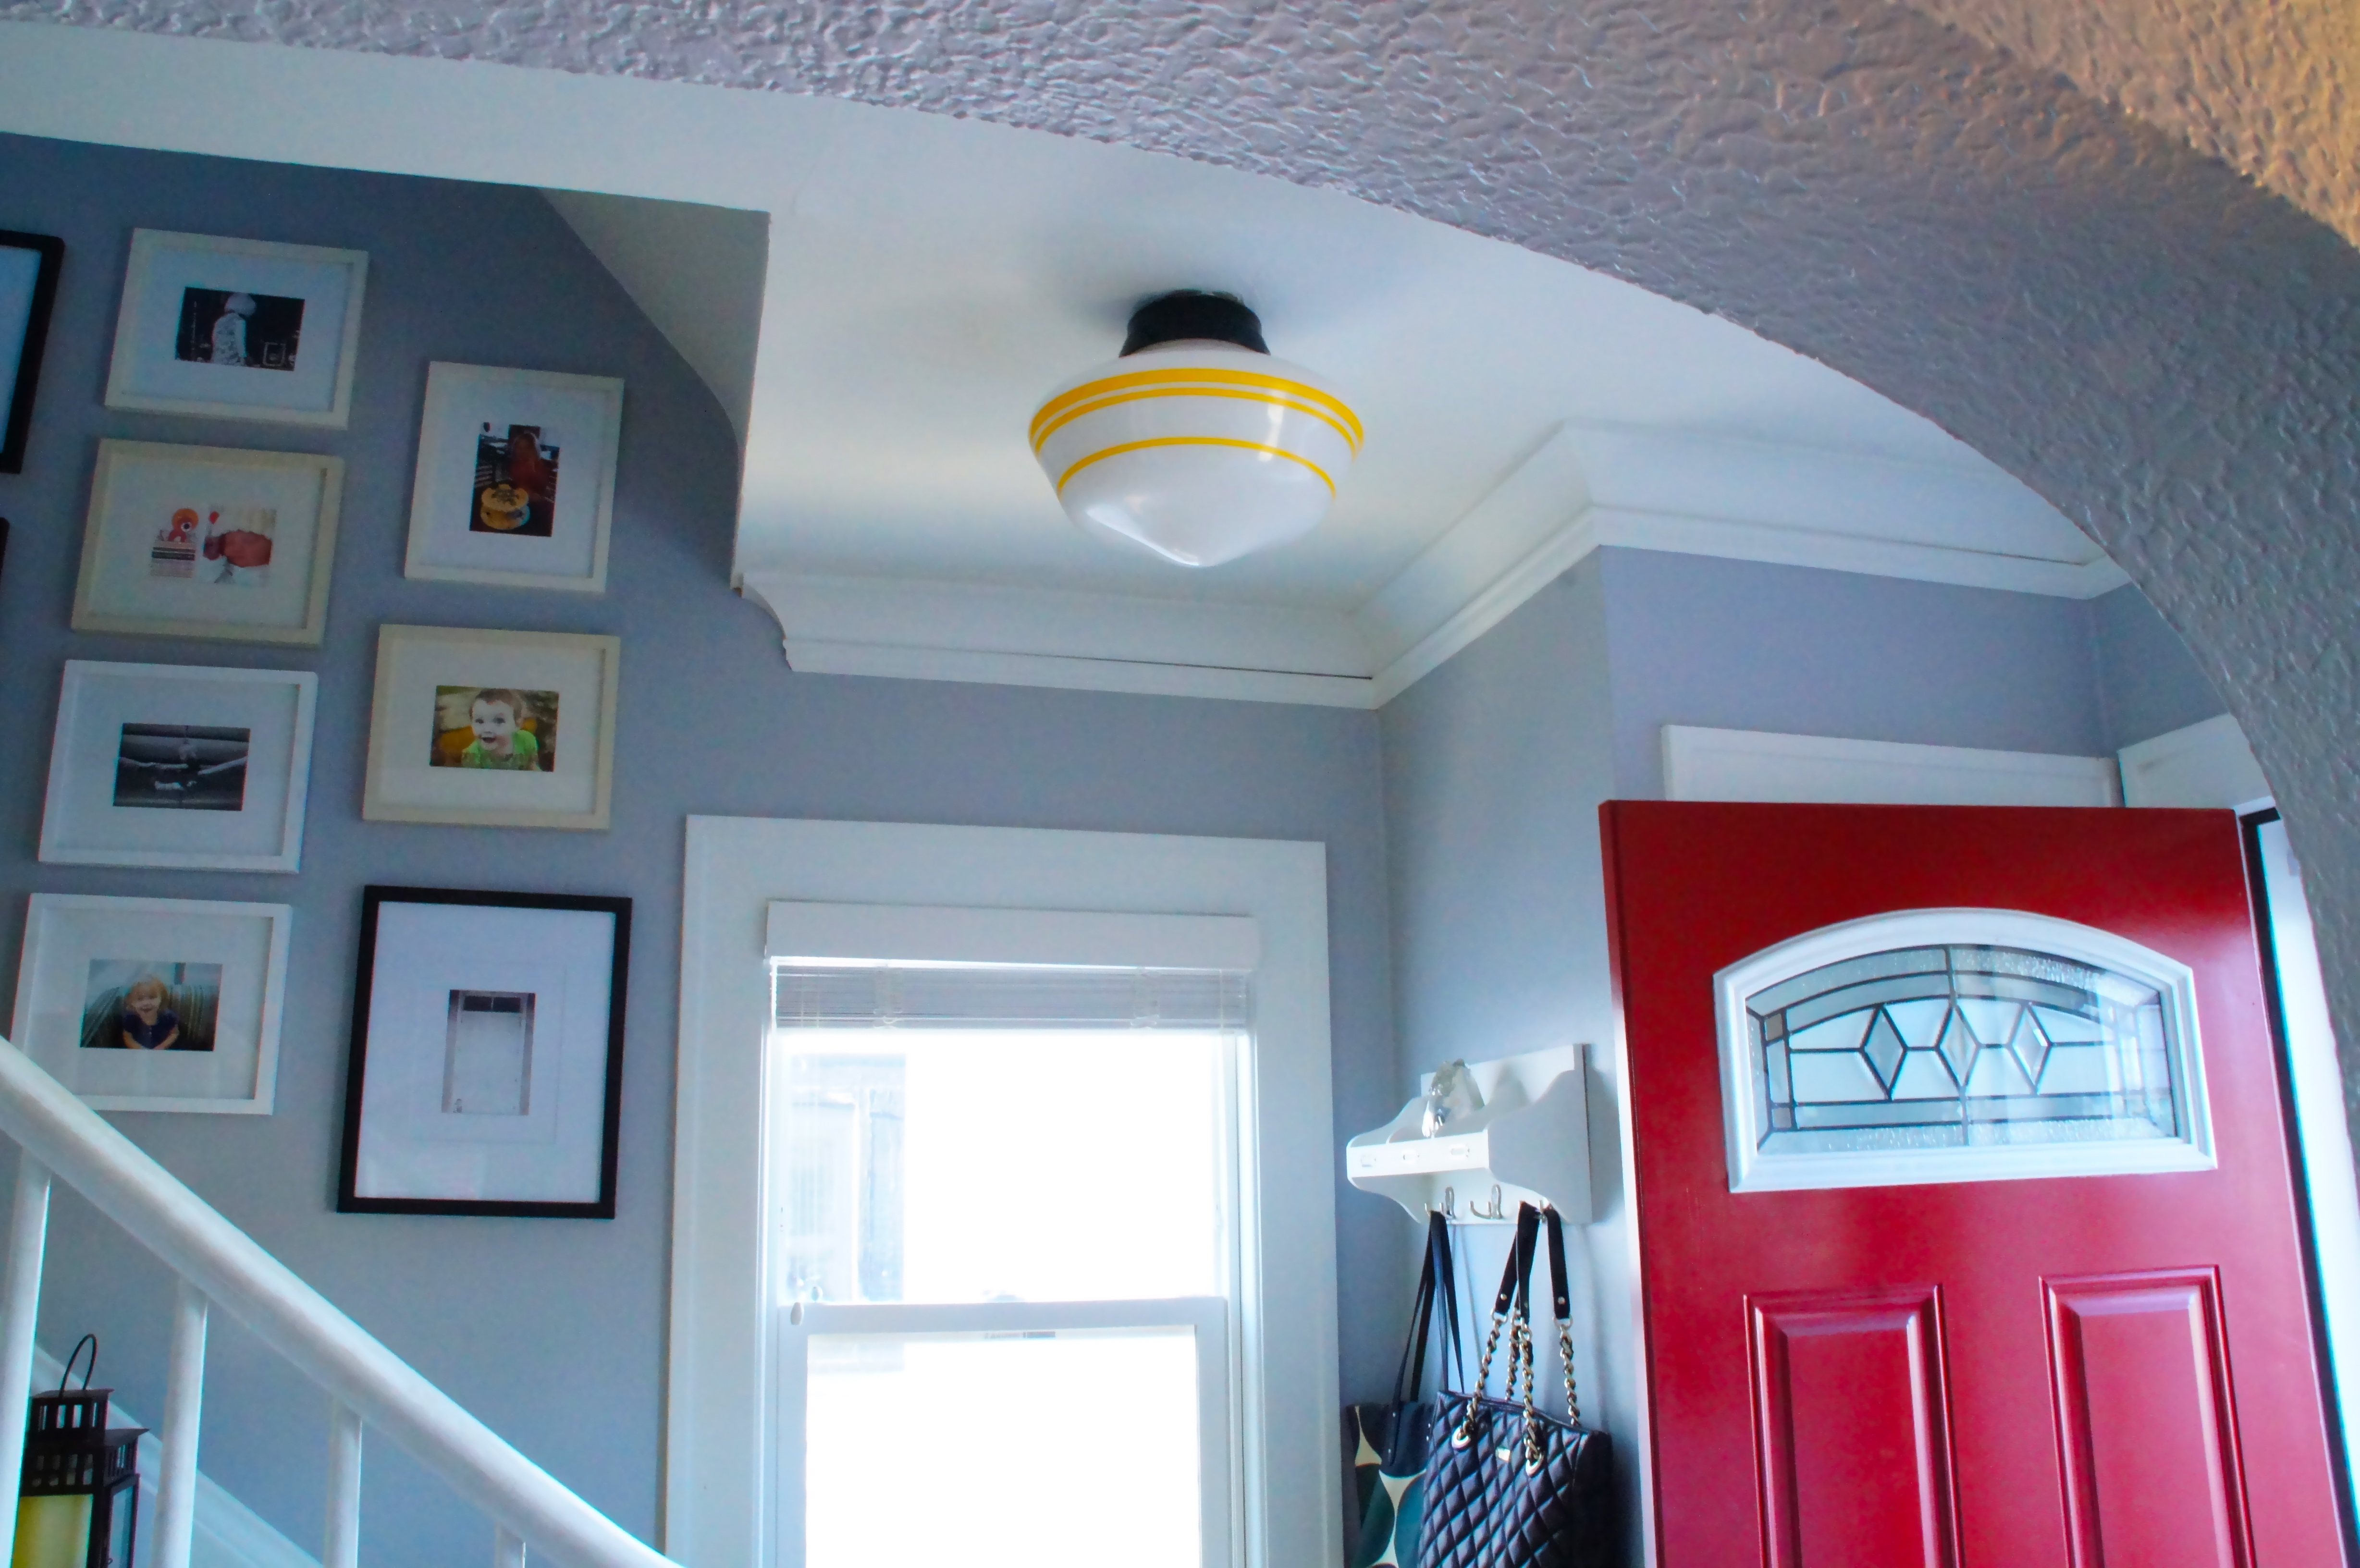
Now, if only I could paint those tiles, and the cabinets, and change the fixture… Someday!

Sideboard savior!

The sideboard is here and it has solved all of my problems! Ok, not really. But I do love it. As usual, I’m kicking myself for not taking a before shot of the space, but just picture it more chaotic. And then the sideboard came and it looked like this for a bit:

IMG_0997[1]

Like that new bookcase against the wall? Me too! [Oh, that was awkward. Did you say, “Yes!”? I thought I heard a “Yes!” Moving on…] You’re wondering about that big silver and black thing on the wall, I can tell. It’s a fireplace of sorts. We had it in the condo and when we moved, we stuck it there. It’s from Overstock and it takes three gel fuel containers and it looks like a fireplace. Kinda. I actually like it, but I don’t like the big black panel against the wall in this room that doesn’t get enough light as it is. So, it had to go. We moved the art that had been on the wall that now houses New Bookshelf Number Two (the one most visible in the above pic) and we are looking at this now:

IMG_0999[1]

Although I love love love hanging art in groups like this, I’ve come to realize I’m never going to get it right. One, I don’t have the patience required for it. Two, I don’t think I have the precise math skills for it. And three, our house is all crooked. So, even if I had it exactly right on the wall, the furniture isn’t going to be sitting perfectly straight on our uneven floors, so the art will inevitably look somewhat crooked. I’m just letting it go and enjoying it as it is. Do I sound convincing?

Stay tuned for kateandgracie’s first guest post! Coming soon.